1
Select your
Setting
2
Select your
Stone
3
Complete
ring
View
The Khloe YG RAD

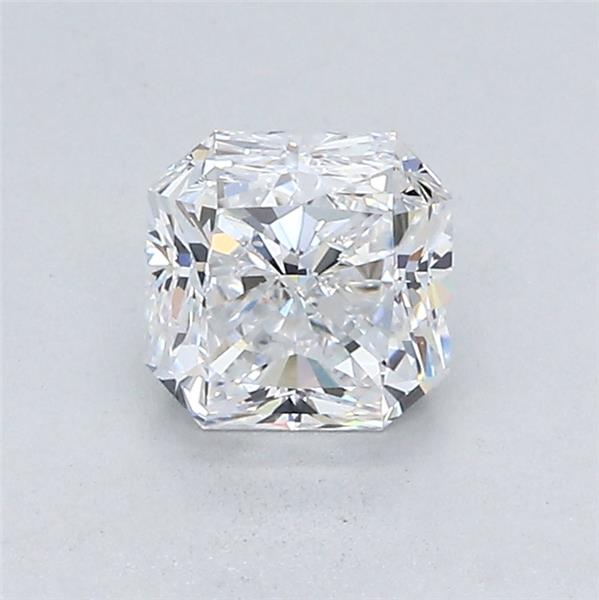
The Khloe with a 1 Carat D SI1 Radiant Natural Diamond

The Khloe

14k Yellow Gold

CA$3,472

Radiant

1.0ct D SI1

CA$6,036

Extras

Select Ring Size

Total Price

CA$9,508
Extra 20% off with codeMYWAY*Ends August 20

Ships in 3-4 weeks

Meet With Our Consultant

Book a personalized consultation with one of our jewelry experts in our showroom or in a one-on-one online session.

Your Diamond info

Carat

1.0

Universal measurement unit for diamonds

Color

D

Color info image
Completely colorless

Clarity

SI1

Clarity info image
Inclusion may be visible to the naked eye

Dimensions (mm)

5.4x5.39

Dimensions (mm) info image
Ratio: 1.0

Certification

GIA

Certification info image
Natural Diamond

Know your setting

Width

2.0mm

Measured at the base of the ring

Approx. TCW

0.35 ct

The setting’s average total carat weight

Metal

14k Yellow Gold

58.5% Gold
30.5% Copper
6.1% Silver
4.7% Zinc
The secret sauce that makes this piece.

Accent Gems

D-F

Color

VVS

Clarity

Side stones average color & clarity

Extras

Center Stone Details
Size
1.0ct
Type
Loose Diamond
Color
D
Clarity
SI1
Shape
Radiant
L/W (mm)
5.4/5.39
Ratio
1.0
Setting Details
SKU
227Q-ER-RAD-YG-14
Width
2.0mm
Center Stone Shape
Radiant
Material
14k Yellow Gold
Style
Round
Profile
High
Side Stones
Average Color
D-F
Average Clarity
VVS
Shape
Round
Origin
Lab Diamonds
Approx. Total Carat
0.35ct

This item is made to order and takes 3-4 weeks to craft. We ship FedEx Priority Overnight, signature required and fully insured.

Received an item you don't like? KEYZAR is proud to offer free returns within 30 days from receiving your item. Contact our support team to issue a return.

Match Made in Heaven

The Lindsey ct WG

The Lindsey

CA$3,472
The Khloe ct WG

The Khloe

CA$2,849
The Kristen ct WG

The Kristen

CA$3,116

In The Box

Inside you will find the diamond certificate, appraisal, and the ring box.

In The Box image 0
In The Box image 1
In The Box image 2
In The Box image 3